 Eileen Yu, Vice General Manager
Published Updated 4 min readTechnical guide
In the production process of plastic products, it is very important to ensure the continuous and stable production of blow molding equipment. However, in actual operation, problems such as mold closing, blowing and mold expansion occasionally occur, which seriously affects the production efficiency and product quality. In order to help our customers solve this problem effectively, we have specially summarized the following practical and feasible elimination methods, which are recommended for your reference.
First of all, we need to understand the nature of the phenomenon of mold expansion during mold closing and blowing. Usually, the occurrence of this problem is closely related to factors such as the blowing pressure of the blow molding machine, mold temperature, raw material fluidity, and mechanical accuracy of the equipment. Therefore, to solve this problem, we need to start from many aspects, check and optimize the relevant parameters one by one.
HT/HTS model mold expansion inspection
During the initial on-site commissioning, if the mold opens and closes and expands, the following checks can be performed:
1: Check whether the emergency time parameter setting is given.
2: Clamping Pressure Setting Issue
Check whether the small pump clamping pressure (i.e., mold locking pressure) reaches 11~12MPa.
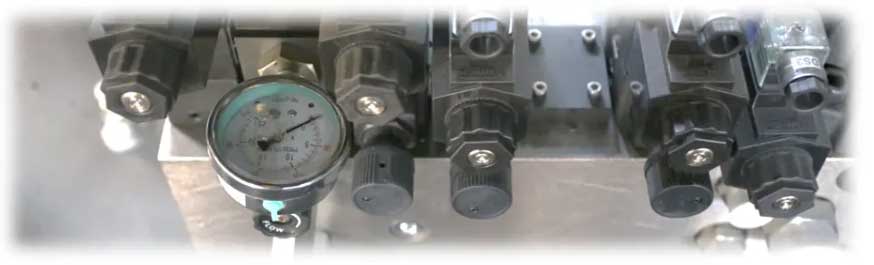
Open the mold manually to the maximum position, push the valve core on either side of the mold locking valve, and observe whether there is a slow mold closing action at the mold expansion station.
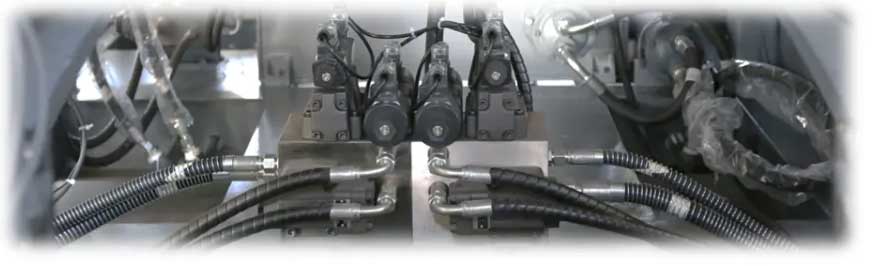
At the same time, observe whether the position where the valve light is on when the station is clamped automatically is consistent with the position of the manual top valve. If not, it means that the clamping oil circuit is reversed. You can swap the valve plug or exchange the left and right station clamping oil pipes.
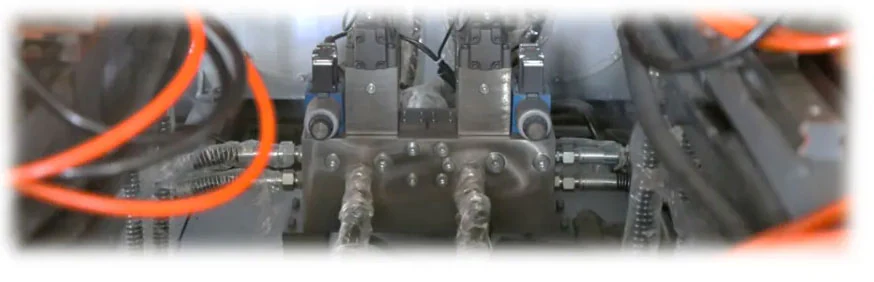
3: single-station model mold expansion situation
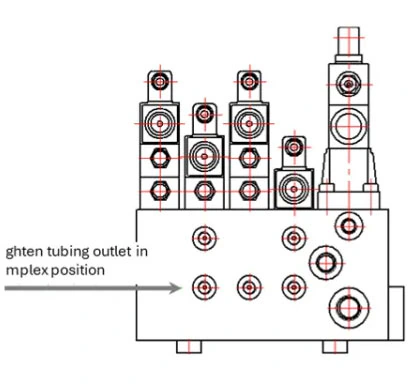
- Check whether the clamping oil pipe is installed correctly. The clamping oil pipe must be connected to the oil outlet at the lower end of the pressure valve plate.
- Check whether the valve model is consistent with DG4V-3-2A/DSG-01 – 2B2.
4: Mold expansion at one station
Swap the left and right station opening and closing valves and the hydraulically controlled one-way valve at the side and rear one by one, and observe whether the mold expansion phenomenon is transferred. If it is transferred, it means that the replaced hydraulic valve is faulty and needs to be replaced.
5: If the valve replacement does not solve the problem, check whether the hydraulic cylinder is leaking.
- At this time, connect a high-pressure ball valve and a pressure gauge in series at the rodless cavity joint oil pipe of the mold clamping cylinder.
- Close the ball valve before the end of the clamping time under the rack, and observe the pressure changes between the ball valve and the pressure gauge between the cylinder. If the pressure continues to drop, it means that the cylinder has internal leakage and needs to be replaced.
- On the contrary, if the cylinder pressure can be maintained, it means that the valve plate may be leaking and the valve plate needs to be replaced.
HS model mold expansion inspection
Different from the small HT/HTS models, the diameters of the mold opening and closing oil pipes of the HS models are the same, and there is a possibility of staggering. If the mold opening and closing mold expansion occurs during the initial on-site debugging, it is necessary to first check whether the oil circuit is installed correctly:
1: Check by conforming to the direction of the clamping oil circuit
- Check whether the closing tubing ultimately goes to the corresponding cylinder rodless cavity closing interface.
- If it is found that a rod cavity connection is connected, the tubing and valve plug signals must be replaced in the order from the mold closing oil to the rodless cavity as shown below.
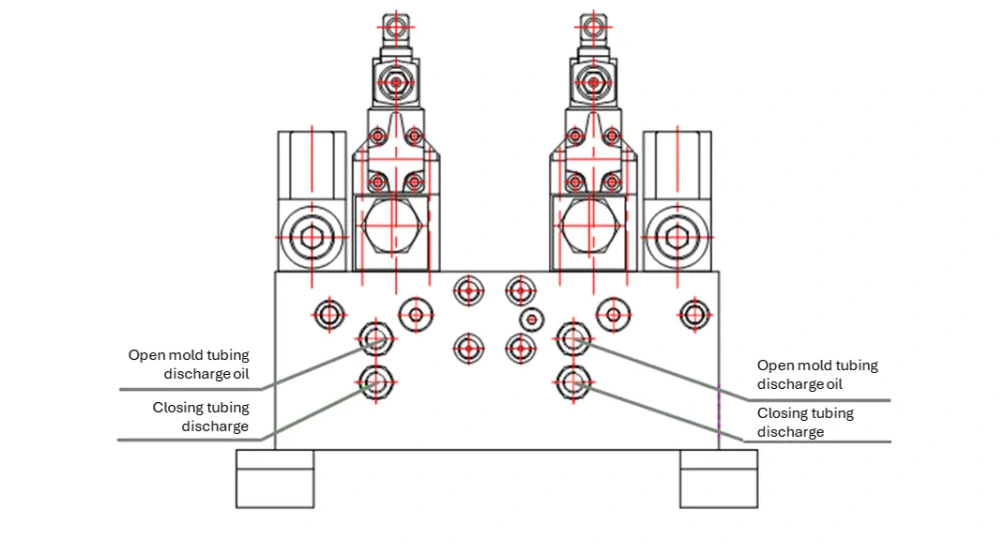
If it is found that the mold is closed at the initial debugging, the actual action is to open the mold. At this time, the direction of the oil pipe must be checked first. The connection method of the mold closing oil pipe is fixed and unique!! If the oil pipe is correct, only the valve plug signal needs to be replaced. Do not replace the valve plug signal without confirming that the oil pipe connection is correct!!
2: After checking the oil pipe, perform the small machine HT/HTS inspection steps 1-5 for inspection.
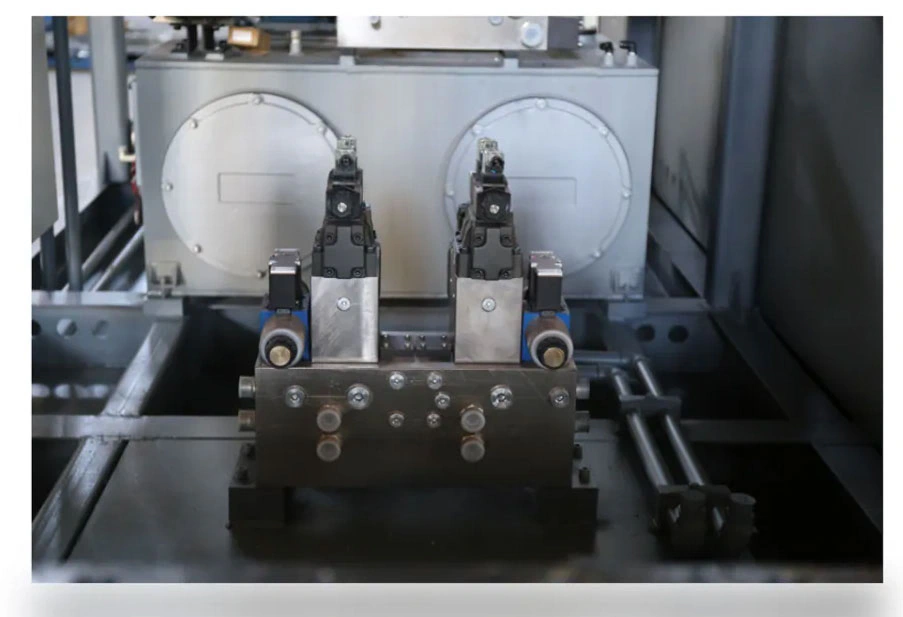
HT/HTS30L model mold expansion inspection
Through the above measures, we hope that you can effectively solve the problem of mold closing, blowing and expanding, and thus improve the performance of your blow molding machine. If you still have questions or need more in-depth assistance, please feel free to contact our customer service team. We are ready to assist you.
More troubleshooting guides
Deformation of blow molded productsMold closing and expansion problemsMold release stepCommon blow molding problemsWall thickness control